


This is what she made being modelled by the beautiful Bibi Munchkin. Now would you like to hear the story of how she did it and you can too? All right then well sit down, make yourselves comfortable and we'll get started.
Step 1: Ingredients

One large T shirt - Find a big old T-shirt like this, the bigger the better.
- Cotton in a matching colour
- Sewing machine
- Elastic - I just used some I had which is about 5mm wide, you could use wider too.
- Safety pin for threading elastic
- Sharp scissors
- Pins
Next you need to measure your little person around the chest, around the bum, from the bust to dress length and from bust to shoulder top.
For munchkin the measurements are:
- Bust 50cm
- Bum 50cm
- Length 40cm
- Shoulder 15cm
- Bust -7cm = 43cm (B)
- Bum x 0.75 = 37.5 cm(W)
- Shoulder x 1.5 = 22.5cm (S)
- Length stays the same 40cm (L)
Step 3: Cutting out the skirt
Lay out your shirt and measure W along the bottom hem and L up the side to make a rectangle. The hemline of the shirt becomes the elastic casing for the top of your dress. If your length is longer than to the armhole then cut two skirt pieces from the centre of your T-shirt, you'll need to sew two seams on either side after inserting your elastic.


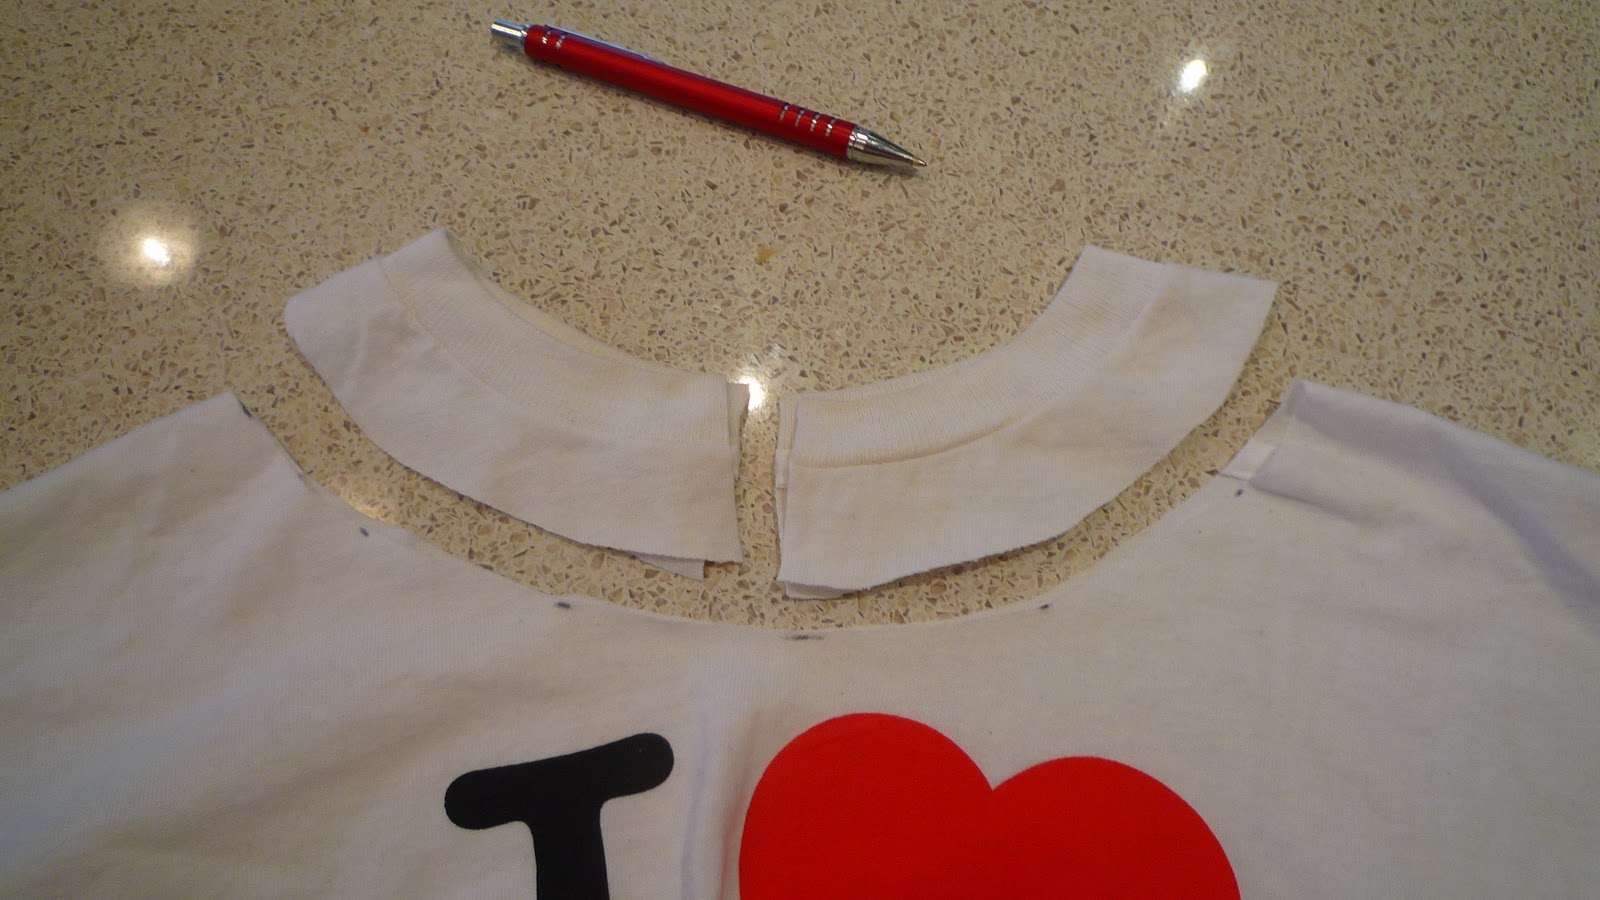
Step 4: Cutting out the sleeves
Measure about 5-7cm out around the collar of your shirt and cut all around evenly. Then cut down the centre to make two equal pieces. You may need to pull the front up to get the collar evenly together all around as the front is usually lower than the back. Measure the length of these and cut to your S length, in this example it is 22.5cm. Luckily that is just how long these are. If this doesn't work you could use the sleeve ends, with hemmed edges for elastic casing, to make the length you need.
Step 5: Cutting the bottom frill
The frill for the bottom edge needs to be 1.25-1.5 times the size of the skirt edge. In this dress the bottom edge of the skirt is 75cm so the frill needs to be between 93cm and 113cm.

Step 6: Decorating the front of the dress
If you want to sew anything onto the front of the dress do it now while it is still a flat piece of fabric.


Step 7: The Frill
Sew all your strips together for the frill to form a big loop then do a line of gathering stitch about 1cm from the edge.

Pin the frill to the skirt evenly before pulling the gathering thread up.


Step 8: The Sleeves
Mark the centre of your front and then place pins at about 7cm from the centre.

Cut two pieces of elastic the length of S, in our case 22.5cm and thread them through your sleeves and stitch at front end to secure. Pin and sew the sleeves on at front markers, then pin together at centre back and stitch on. Make sure you have caught the elastic at both ends.


So there you have a very easy little dress made from an old t-shirt and a bit of elastic. You can be as creative as you like with decorating.
Step 9: Photograph your model in a picturesque back yard.


No comments:
Post a Comment