Make Your Own Gorgeous Hobby Horse
One day in the little house with the long legs down by the creek... a wee little patchwork pony was born.Moon mouse had been shopping and seen hobby horses at the toy shop however he didn't like the oh so pink and pretty and plastic look to them all. So he came home and decided to make one instead enlisting Moon Girl to help too.
 |
| Neigh, I even have bells on my halter. |
I love it because it's so bright and colourful and of course the satisfaction of having made it ourselves.
If anyone is interested in the know how (it's really not that hard) it follows after the break...
Step 1. Gathering the Ingredients.
We went to Bunnings Hardware and bought
- 2 simple wheels
- some 10mm threaded rod
- two round nuts
- a plastic garden stake.
Next stop was Spotlight for the fabrics etc.
- half a metre of gorgeous quilting fabric (you only need a fat quarter 50x55cm though)
- 2 very large brown eyes
- some braid for the halter
- some multicoloured bells
At home we had some yellow felt, stuffing and red corduroy for the mane and some ribbon.
Step 2. The Pattern
I just drew a horse head shaped bit for the two sides, a tapered gusset the length of the inside of neck to nose tip, and ears. The head piece here is about 30cm high.
You need to cut out 2 sides, 4 ears and 1 gusset. Make sure the heads are mirrored so the fabric design is on the outside when you sew them together.Step 3: Sew the Head Together
Pin and sew the gusset to one side of the head with the pointy end at the nose.
Then sew the other side of the head onto the other side of the gusset ending so there is no gap between the two seams at the nose.
Step 4: The Mane
Cut a strip of fabric about one and a half times the length you want the mane to go and sew the two ends right sides together.
With right sides out sew along the raw edge making little pleats all the way along.
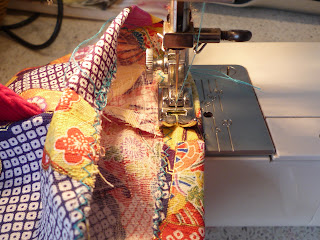
Stitch the mane to the right side of the head starting somewhere up the top. Then pin the two heads together and stitch the seam all the way from the nose to the neck.
Step 5: Eat a Dill Cucumber
We used Fletchers Dill Cucumbers, they are a dill spiced sour gherkin which is crisp and delicious.
You could also have them with cheese and crackers and a glass of wine but we just had it on a fork.
Step 6: Clip the Seams
Clip all the curved seams so that they will sit properly when turned right side out.
Step 7: The Eyes
Cut two eye shapes out of felt and cut holes to insert the eyes.
Cut small slits on the pony's head where you want the eyes to go and insert them, then push the backs on tightly.
Step 8: Casing for Draw String
Finish the bottom edge with a zigzag stitch then fold in and sew a casing all around leaving a small gap at the back for your ribbon to go in.
Step 9: The Stick and Stuffing
Cut a stiff cardboard roll down to size and stick it onto the end of the garden stake at 90 degrees. Firmly stuff the inside of the tube with stuffing.
Partially stuff the head then insert the stick and continue to stuff around it. Make sure the head is firmly stuffed so it will keep it's shape. Insert the ribbon into the casing and tie tightly.
Step 10: The Ears and Halter
Stitch darts in the middle of two of the ear pieces.
Sew the back onto each ear with right sides together then clip the seams. Turn the ears the right way in and fold up the bottom raw edge, then sew a line of straight stitch up the centre along the dart seam.
Stitch the ears onto the head by hand and tie the halter on. The halter was tied around the nose then crossed at the back of the head and tied together again in front of the ears. Now sew bells along the halter and to the head to keep it in place.
Step 11: The Wheels
Cut the stick down to the length you want then drill a hole through the end for the threaded rod to go through. You could simply use bolts if you like we just liked the domed nuts better.
Now put on your wheels and nuts. We used some lock-tight on the nuts so they wouldn't fall off.
The End


No comments:
Post a Comment